
MANAGEMENT
CLAIMS UNDER THE WARRANTY
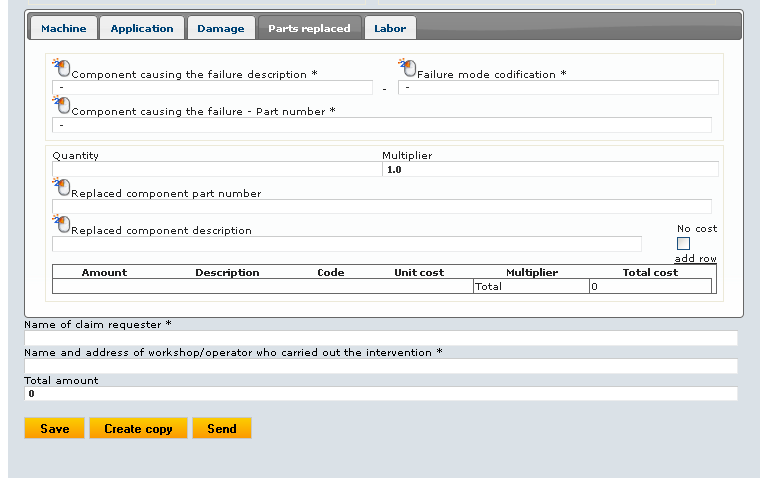
PARTS REPLACED TAB:
This tab contains
information about the parts involved with engine repair, the fault code and the
VM component that has been the cause of the fault on the engine.
This
tab is also used to insert all the components that have been replaced during
the repair, either the in case the
workshop has used parts by its warehouse or
in case the workshop has received the parts directly from VM.
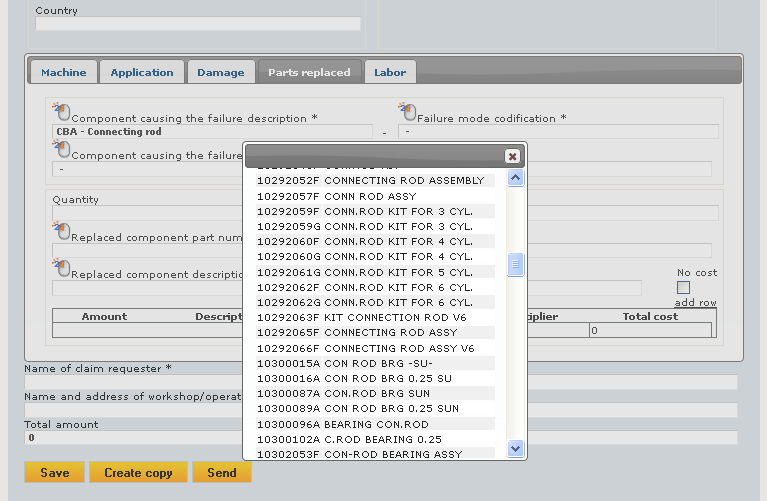
Double click on the component code field (first
row left field)
The system
will show the engine component p.n. selection list In
the window, the user can search by group code or description.
Here is an
example with the research already carried out for the description
"rod" obtained after typing the word "rod" in the
description field and clicking on “Search”.
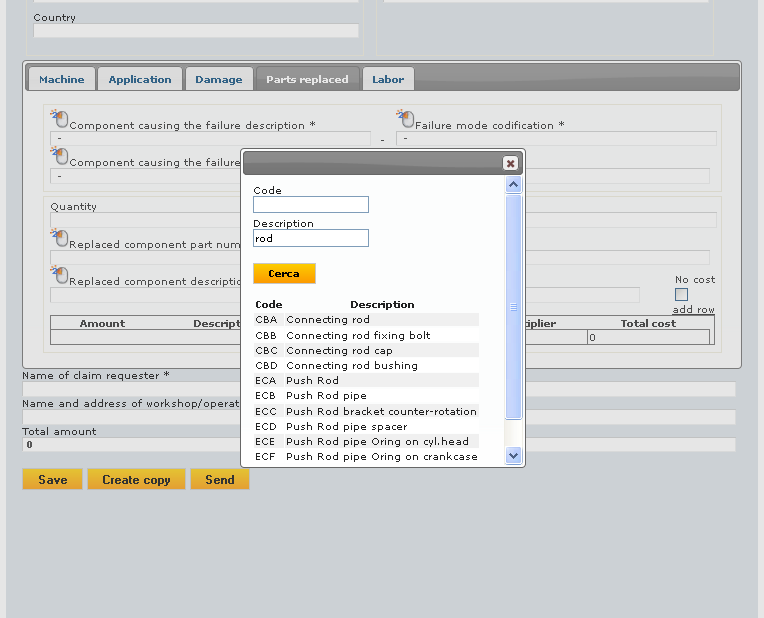
Select by
double-clicking the part affected by the defect.
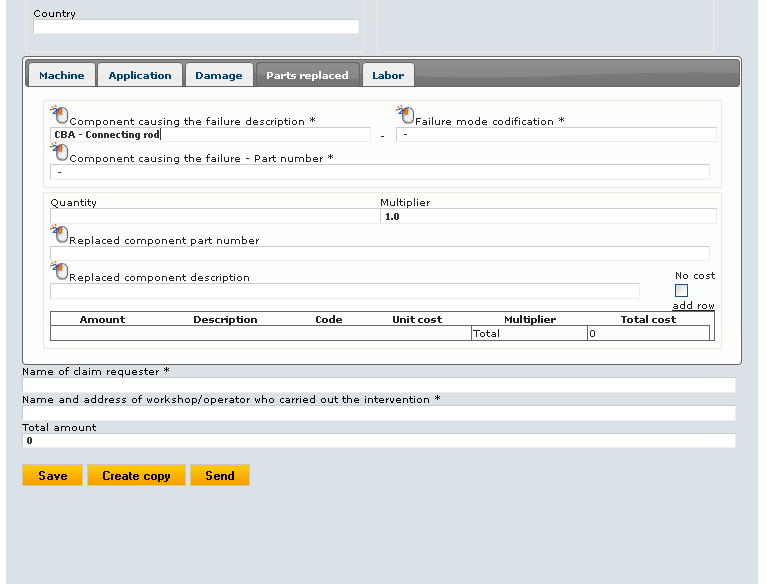
Move your mouse
to the field fault code on the right side and double-click .
Set a parameter selection: code or description and click on “Search”.
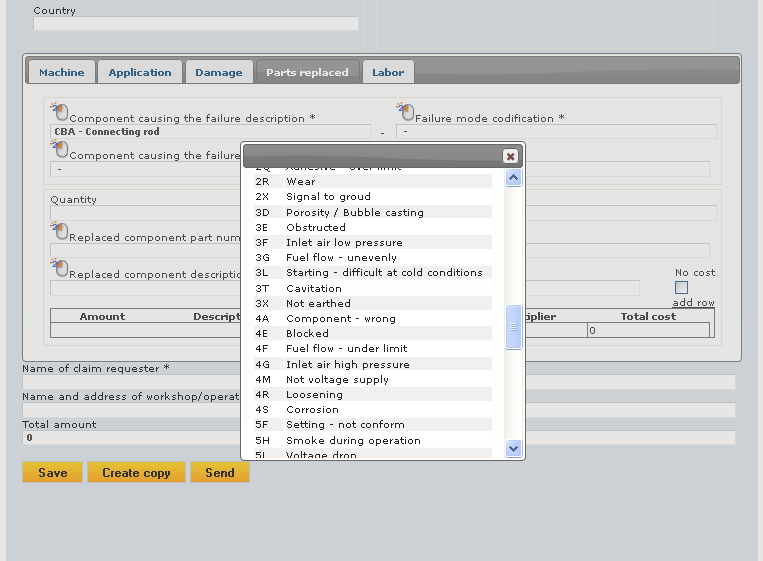
Select the fault code by double-clicking to set the
data on the card.
Double click on the code component field that caused the failure and select in
the usual way the VM part number causing of the defect.
Proceed with the inclusion of all components
replaced during the repair .
Type the quantity related to the first code replace, if necessary modifing, the multiplier.
To insert the component replaced, double-click
on the code field or description field in the search window of the component,
type the product p.n. in the “code” field or type the part description in the
“description” field, then click the “Search” button.
Select from the affected
component p.n. by double-clicking on the corresponding line.
Click the field "no cost" only in case the item replaced for repair
was dispatched from VM for specific reasons.
Click on "add row", to add the element in the list
of components replaced.
Proceed in the same way to add all the components used
for repair.
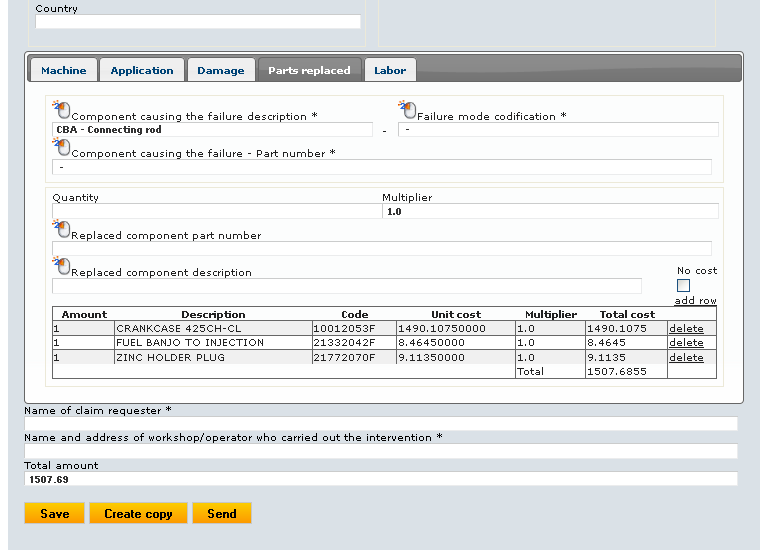
The user can delete a row already inserted by
mistake by clicking on "Delete" button on the line to be deleted.
The user can edit an already inserted row by double-clicking on the row in
question.
In this case, after double clicking, all the row data will appear in the
related fields, as shown below, and the button "add row" will be
changed to "update". At this point the user has the possibility to
change the data previously introduced.
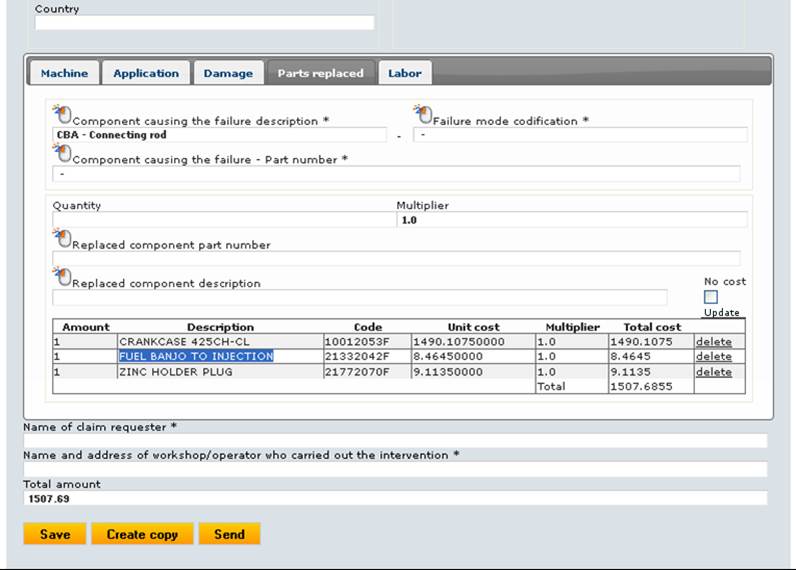
Once the user has edited the data: quantity, multiplier, part
number and “no cost” button, he/she could type new information and click on the
"update" button.
Important: after the changes, always remember to click the button
"Save" to register the data in the database of the software WCL .