
MANAGEMENT
CLAIMS UNDER THE WARRANTY
MACHINE TAB
Inserting the VM engine serial.
Tag the field of engine number and double click on the left mouse button, look
for the VM engine serial number into the shown curtain menu.
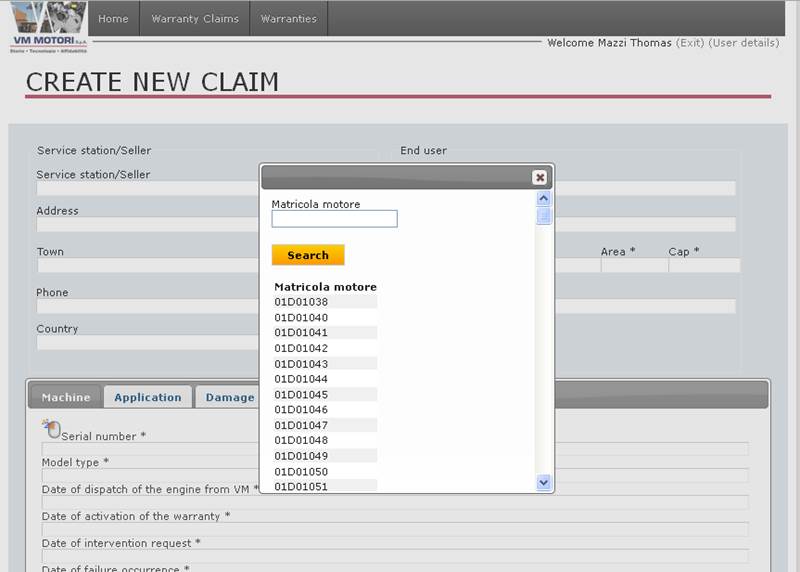
Enter in the "engine serial number" field the
serial number, or type the initial part
of the VM serial number involved with
the warranty service request.
Click on search and wait for the answer.
Then double click the VM serial number concerned with your request.
After these operations, the screen will be updated with information about the
end user of the vehicle in the right area of the header, only if the warranty
in service was activated at the time of sale of the vehicle for the engine
interested.
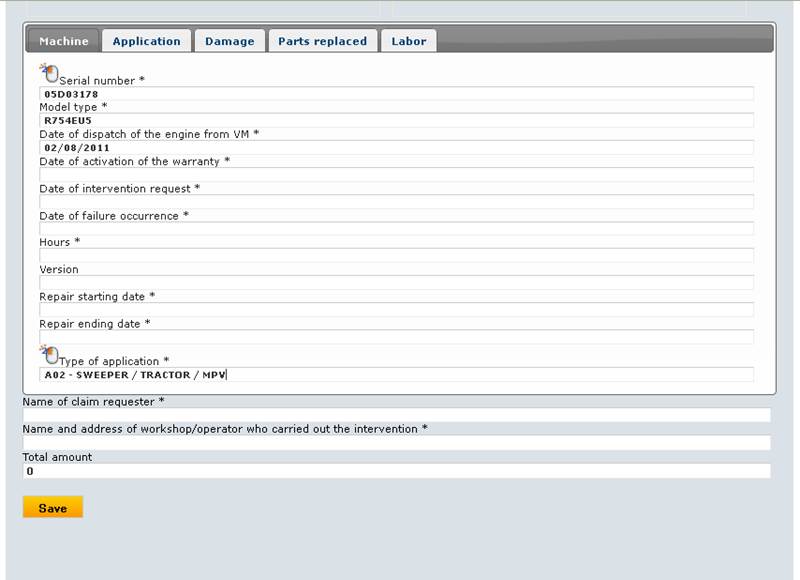
In Machine tab will appear the following information: Model type, Date of
dispatch engine VM, VM engine version.
If the warranty card has been activated via the WCL,
the date of dispatch of the engine and date of activation of the warranty will
be automatically loaded. In case the warranty card was not activated, the user
must type the information related to the date of activation of the warranty.
The user must fill in the following information of the engine failure
details:
• Activation Date warranty service (if not loaded automatically)
• Request Date intervention
• Date failure
• Hours
• Start Date repair
• End Date repair
• Type of application (if not loaded automatically)
Important: if there is no
application code uploaded by the system, please go to “Application tab” and fill in the
brand and vehicle type as explained in the section “Application tabs”.
In some cases to a specific brand and type
is associated to an application specific code, that will be
automatically set in the field "type of application" in "machine
tab".
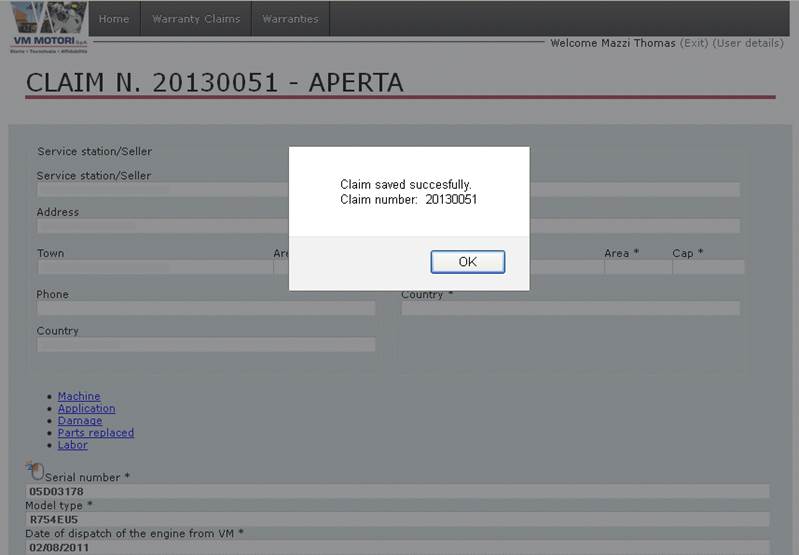
If for any reason the user wishes to interrupt the section (while entering data
into the system WCL), he/she must click on the "Save" button to
record the information written in the database till the moment.
When the user click on the "Save" button, if the operations of data
recording were performed correctly, the message shown below appears, informing
the user of the registration occurred, and of the unique claim request number
assigned to his/her request.
Important: when the
user presses the "Save" button, the request is registered in the
system but is not sent to VM
at this stage. It will only be sent to VM for processing, once it
will be completely filled in. Only when completed, the request can be sent by
pressing the button “Send”.
After at least one saving request, the system shows
two more buttons: one called "Copy claims" and the other called
"Send".
The "Send" button can be clicked only when all required data are
filled in and saved, and is used to send the request to VM Motori.
By clicking on the "Send" button, the system will activate a series
of consistency checks among the dates typed by the user in the engine failures dates fields. An
error will report an error if :
• the start date of repair will be earlier than the date of application for
intervention
• the start date of repair will be earlier than the failure date
• the date of warranty in service activation will be greater than the date of
claim.
The button "Copy claims" can be clicked at any time, when the user
needs to copy all engine data registered within an existing in a new claim
he/she wishes to open. It could be very useful when part of
the data recorded within the claim already registered are the same for
the new claim to be opened.
Important: The data in
"Labor tab", described in the following sections, are conditioned by
the type of engine in object on the claim and the application code. If, after
the “machine tab” has been completely filled in, the VM engine serial number
previously entered or application code will be changed, all data within the
“labor tab” will have to be reinserted.